How to Photograph Your Watch Like a Pro
Staging Your Watch: The Eye, the Light, the Gesture
Photographing a watch isn’t simply a matter of megapixels. It’s a quiet art—almost ceremonial—where lighting reveals volume, where the dial becomes a miniature landscape, where a single reflection can speak to the bevel of a lug as clearly as a try-on at the boutique. In workshops, watch photographers talk about “shaping” light the way one polishes an edge: with patience, precision, and respect for materials. A great photo isn’t luck; it’s a carefully prepared meeting between your watch and the light.
Prepare the Watch Like a Studio
Cleaning and Courtesy Adjustments
- Microfibre cloth and air blower: remove dust and smudges. One speck looks gigantic in macro.
- Rodico (or cleaning putty): for bezel recesses, between the lugs, around the crown.
- Bracelet ready: brush brushed steel with the grain, buff leather, adjust the links.
- The classic time: 10:10, small seconds at 30, date set (or hidden if it’s out of cycle).
- Winding: a full power reserve ensures a smooth seconds hand in a “live” shot.
Simple Accessories That Change Everything
- Window and white curtain: natural light diffused without harshness.
- A4 sheets, a white tablecloth, a shoebox: perfect for improvising a mini studio and reflectors.
- Black cards (“flags”): they sculpt crisp contours on mirror-polished surfaces.
- Tripod, remote release (or 2-second timer): stability = sharpness.
- Circular polarising filter: reduces unwanted reflections on the crystal.
- Adhesive putty: to hold the watch at an angle without it slipping.
Mastering Light: The Most Precious Complication
A watch reflects everything: you, the room, the window, the lamp. The secret? A large, soft source, placed intelligently. Indirect daylight remains unbeatable; a softbox or a homemade light tent can work wonders. Ban the front-facing spot: it flattens volumes and drowns the dial in reflections.
- Place the watch at 45° to the window. The light skims across, revealing textures without blowing out the crystal.
- Bring a white reflector in on the opposite side to lift shadows and smooth the markers.
- Use a black card to draw a dark line along a polished bevel: instant “high horology”.
- With a polariser, rotate slowly until you find the right balance between dial legibility and crystal sheen.
The Dial as a Landscape
A sunburst finish reveals its rays when the light “rakes” across the surface; guilloché comes alive with the slightest change of angle. Tilt the watch rather than the camera: 10 to 20 degrees is enough to ignite the striations, add depth to the rehaut, and make faceted markers catch the light. If the material is dark, underexpose slightly to preserve nuance; if the dial is light, protect the highlights.

Play with Reflections—Don’t Suffer Them
Reflection is your brushstroke. Without it, mirror polish looks flat; with too much, it turns messy. Look for crisp but controlled catchlights.
- Tilt the watch until the bezel regains a continuous bright edge.
- Remove all point sources (bare bulbs, spots). Prefer one large, single source.
- Place a black flag at the edge to define a line and lighten the crystal.
- On a domed sapphire, a slight off-axis camera position is enough to eliminate glare.
Composition and Style: Tell a Story Rather Than Simply Show
Wrist Shot or Still Life?
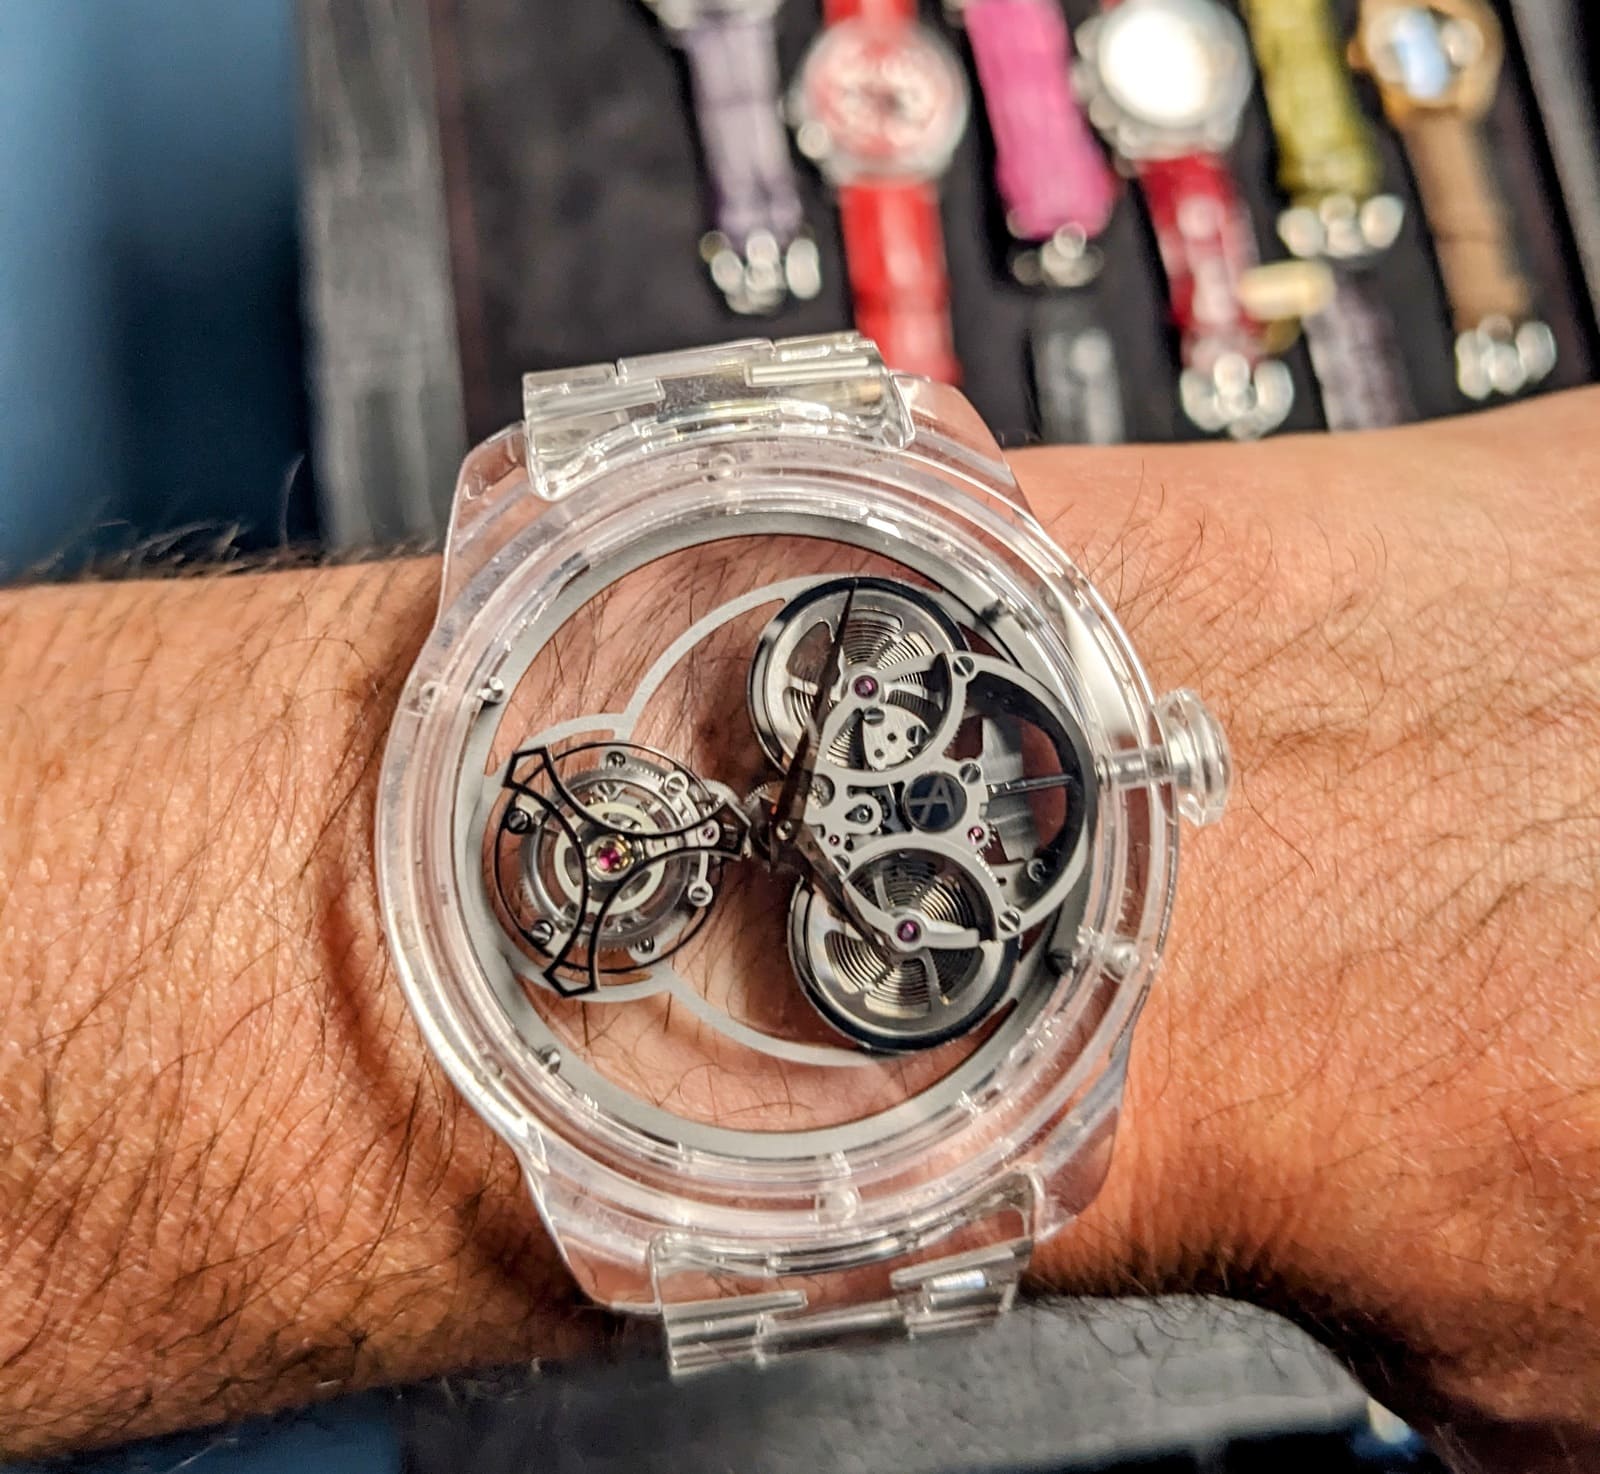
- Wrist shot: facing a window, elbow close to the body, wrist turned slightly three-quarter. The arm guides the eye to the watch.
- Wardrobe: shirt cuff, leather, the grain of a desk… favour materials that converse with the piece.
- Still life: map, passport, glasses, driving gloves… one accessory is enough. Beyond that, the image loses itself.

Simple Rules That Work
- Rule of thirds: place the watch on a strong point; let the frame breathe.
- Leading lines: a book’s diagonal, a strap stitch, the grain of wood guides the eye.
- Restricted palette: two dominant colours + a metallic accent. The dial must remain the hero.
Shooting Techniques
Smartphone or Camera: Choosing the Tool
A recent smartphone is enough for a superb photo. Enable Pro/RAW mode if possible, avoid the ultra-wide angle that distorts, and favour 2x/3x. Lock AF/AE on the logo or a marker, then drop exposure by -0.3 to -0.7 EV to protect the dial. A small tripod and remote triggering change the game.
With a mirrorless/DSLR, a 60 to 100 mm macro is the ideal lens. Start at f/8–f/11, ISO 100–200, on a tripod. Move the watch rather than changing the lighting; every millimetre matters when you’re taming a reflection.
Sharpness and Depth
- Focus on a marker close to the plane of the hands (1 o’clock/11 o’clock) for optimal perceived sharpness.
- If the watch is thick, do simple focus stacking (2–5 frames) to keep everything sharp without stopping down excessively.
- Avoid diffraction: beyond f/16 on most sensors, micro-detail fades.
- Stabilise: tripod, self-timer, or stabilisation enabled if you’re shooting handheld.

Editing and Colour Fidelity
Editing isn’t make-up; it’s fine adjustment. Start with white balance: daylight (around 5200 K) as a baseline, or a grey card if you have one. Adjust contrast and clarity sparingly; a touch of micro-contrast can wake up bevels, but watch for noise on the dial.
- Remove dust and fibres with the healing tool. Be precise—don’t erase the piece’s character.
- Moderate saturation: keep a blue that stays blue, a green that doesn’t take over. The dial sets the rules.
- Final sharpening after resizing. For the web, 2048 px on the long side and a light sharpening are enough.
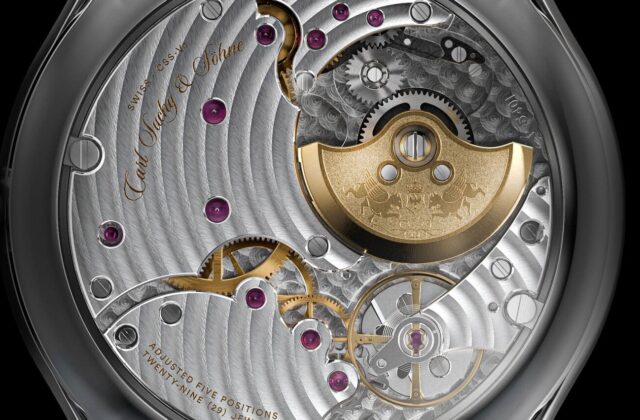
- Bonus: a “Super-LumiNova” shot in low light and a close-up of the movement enrich your series.
Quick Checklist Before Publishing
- Time set to 10:10, hands clear of markers and text.
- Clean dial, dust removed, crystal spotless.
- Soft light, controlled reflections, no bulb reflected in the sapphire.
- Level horizon, airy composition, readable subject.
- Faithful colours, whites not blown, blacks not crushed.
- Sharp where it matters, no motion blur.
- Format suited to the platform (4:5 or 3:2), careful compression.
- A signature detail: bevel, guilloché, strap texture… does your image say something?
Ultimately, photographing a watch is a way of paying tribute to the hands that made it. A little method, well-placed light, a dial treated with respect—and your photo stops being a snapshot and becomes a portrait. The rest is practice and a taste for detail, exactly like watchmaking.